The Subscribers tab under Settings > Telegram Subscriber Manager shows every Telegram user associated with your channels or groups. Search, filter, take actions, and verify live membership status from one screen. This feature is available in both the Lite and Pro versions since v2.0.0.
Where to Find the Subscriber Table #
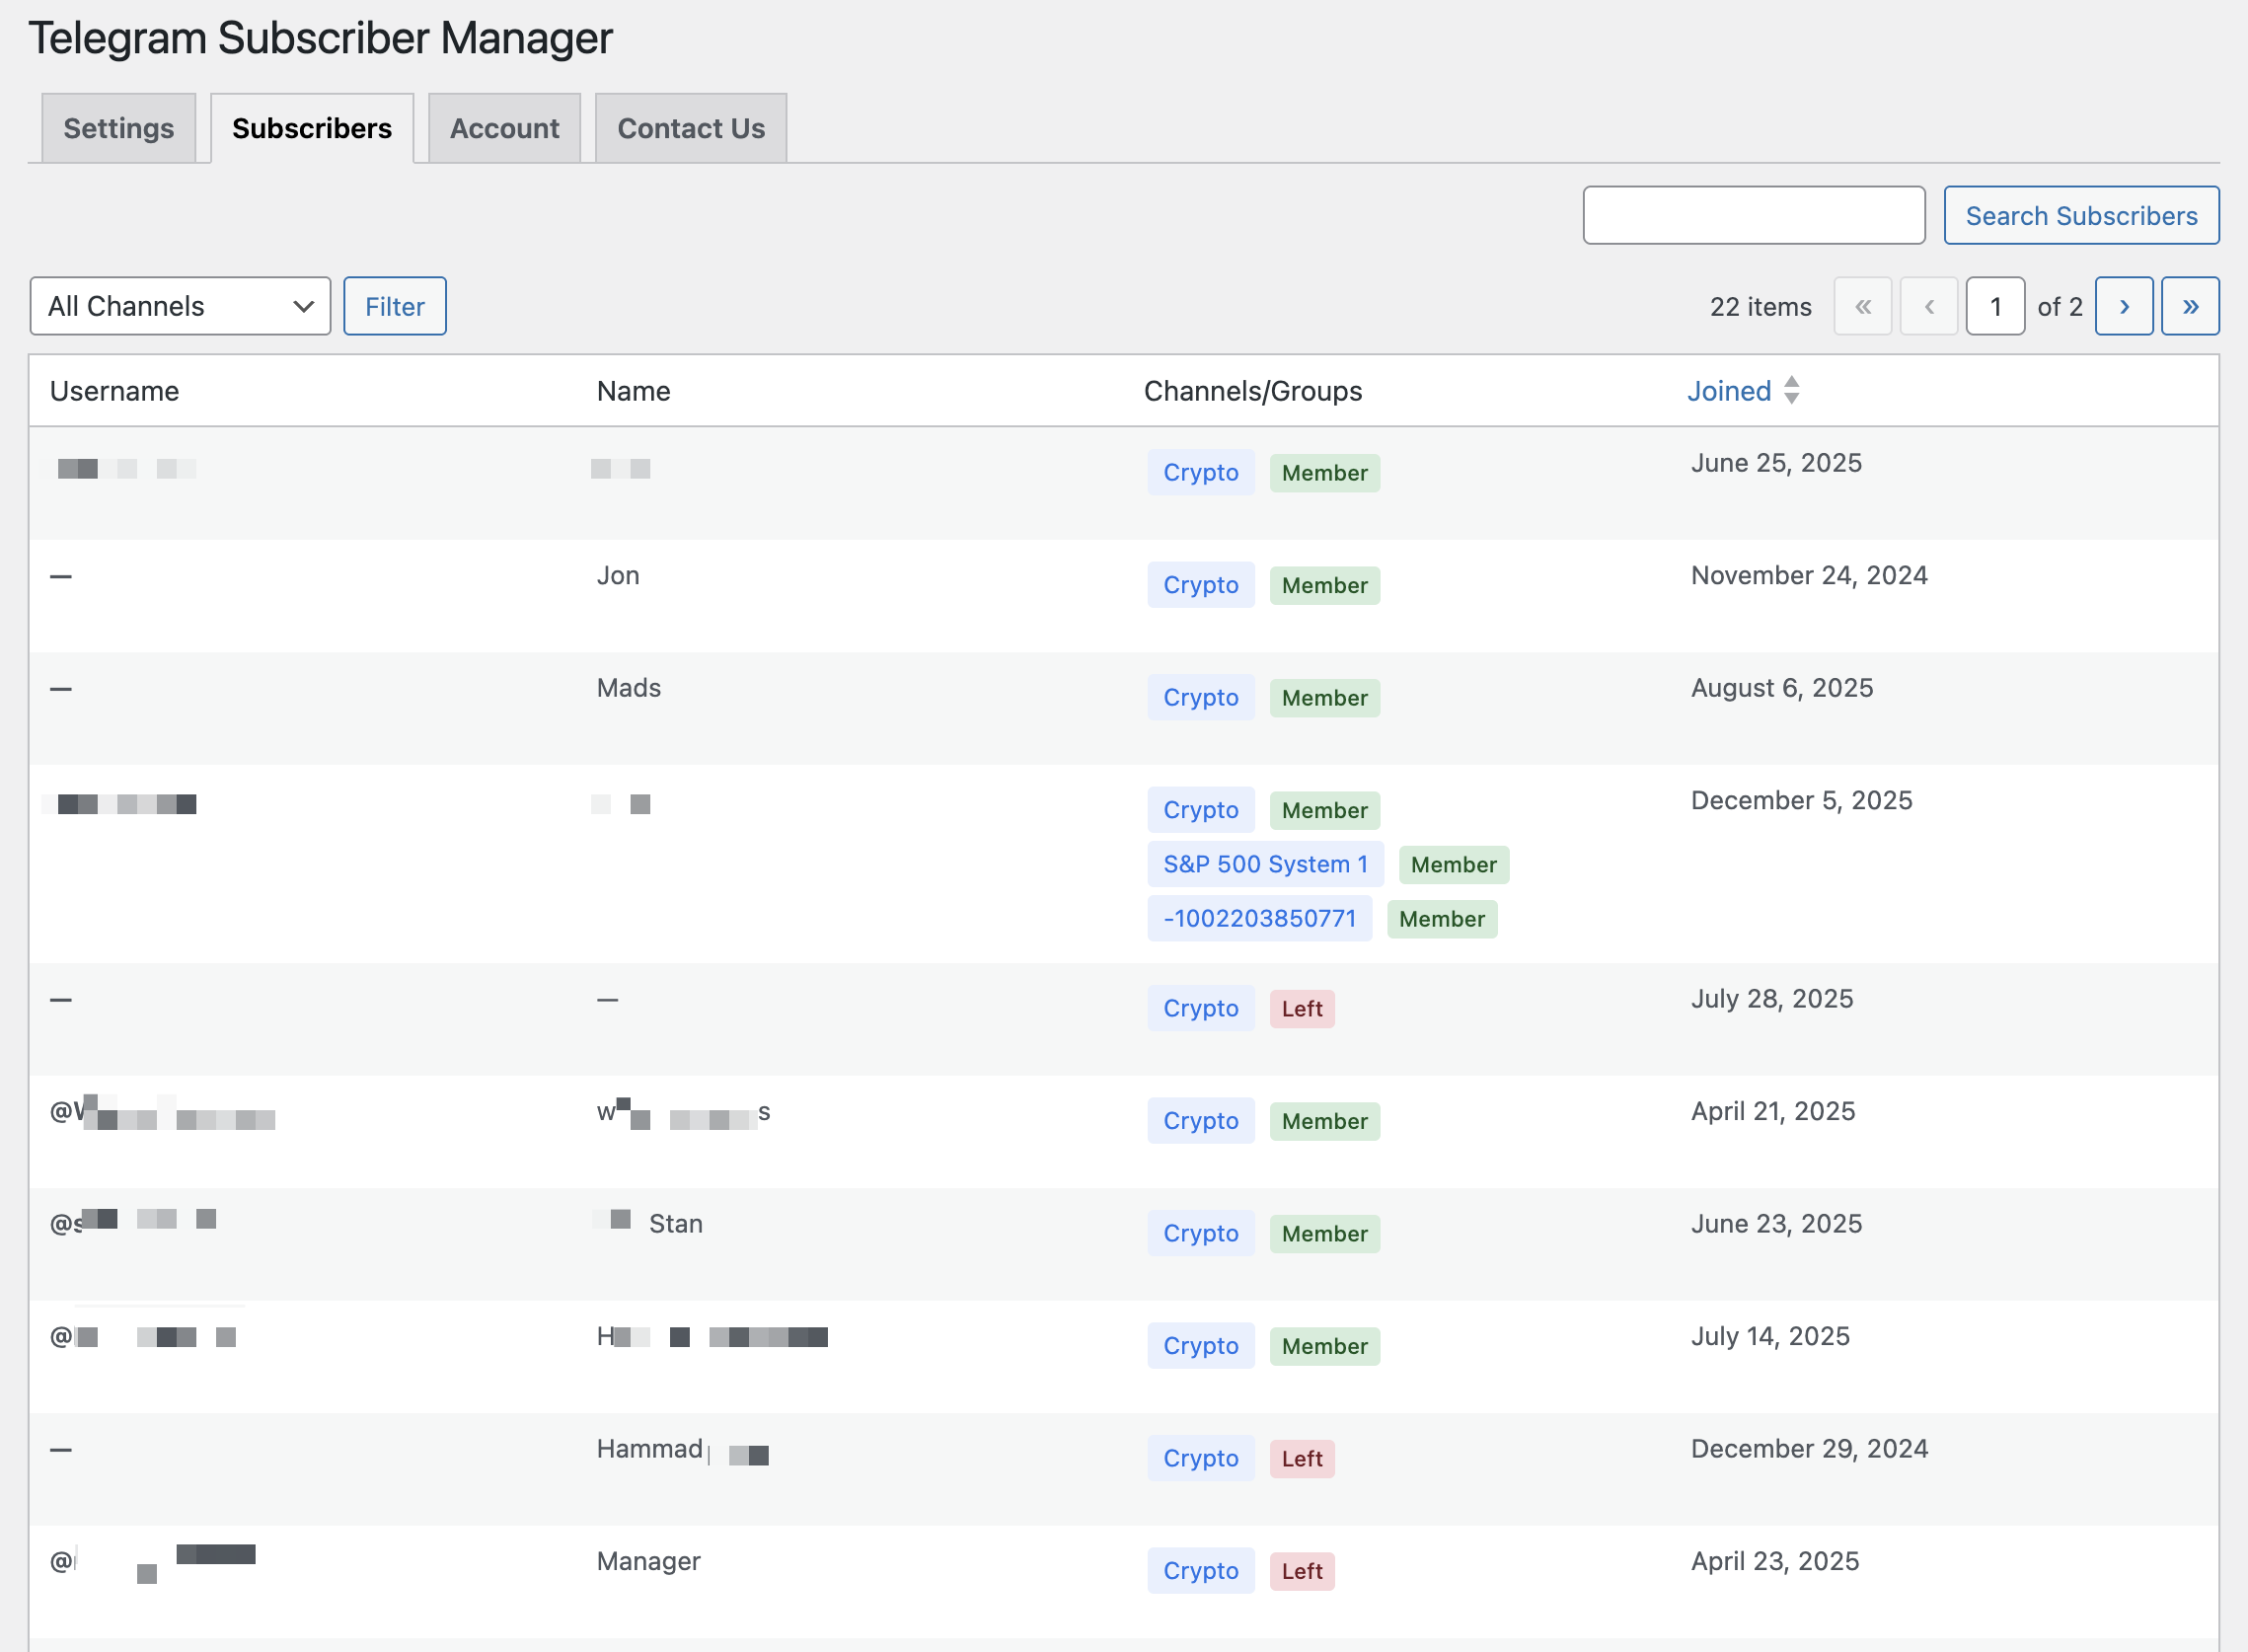
In your WordPress admin, go to Settings > Telegram Subscriber Manager and click the Subscribers tab. The table loads automatically with your most recent subscribers first.
If you’re not sure where to find the settings page, see Plugin Settings Location.
Understanding the Subscriber Table #
The table shows one row per Telegram user with four columns:
- Username — The subscriber’s Telegram @username, if available.
- Name — The subscriber’s first and last name from Telegram.
- Channels/Groups — Each channel the user is associated with, paired with a color-coded status badge.
- Joined — The earliest date the user joined any of your channels.
The table paginates at 20 subscribers per page. Click the Joined column header to sort by date.
Status Badges #
Each channel in the Channels/Groups column shows a color-coded status badge indicating the subscriber’s current relationship with that channel:
- Member (green) — The user is an active member of the channel.
- Pending (yellow) — An invite link has been issued but the user has not yet joined.
- Left (red) — The user voluntarily left the channel.
- Removed (gray) — The user was removed by an admin action.
- Banned (red, bold) — The user is banned from the channel and cannot rejoin.
- Expired (orange) — The user’s access expired due to a subscription ending or simple product expiry.
- Failed (red) — Pro. The invite link could not be generated (for example, the bot is missing the “Invite Users via Link” permission, or Telegram was unreachable). The reason is shown in the Pending Invites list, where you can retry. See Pending Invites and Retrying Failed Invites below.
These statuses update automatically when Telegram sends webhook events — for example, when a user joins, leaves, or is removed from a channel.
Searching and Filtering #
Use the search box at the top right to find subscribers by username, name, Telegram user ID, or WooCommerce order ID. Press Enter or click “Search Subscribers.”
Use the channel filter dropdown at the top left to show only subscribers associated with a specific channel or group. Select a channel and click “Filter.”
Search and filter can be combined. Clear the search box and reset the dropdown to “All Channels” to see all subscribers again.
Viewing Subscriber Details #
Click View Details under any subscriber’s username to open the detail modal. The modal shows:
- Username — The subscriber’s Telegram @username.
- Name — Full name from Telegram.
- Telegram User ID — The subscriber’s numeric Telegram ID.
- Orders — Links to WooCommerce orders that granted access, with order status. Click an order number to open it in WooCommerce.
- Channel Access — Each channel with its current status badge and available admin action buttons.
The modal also performs a live check against the Telegram API when it opens. If the subscriber’s actual membership differs from the database record, the status is updated automatically.

Admin Actions #
The detail modal shows context-aware action buttons for each channel. The available actions depend on the subscriber’s current status in that channel.
Remove — Available for active members. Removes the user from the channel but allows them to rejoin with a new invite link in the future.
Ban — Available for active members. Permanently bans the user from the channel. They cannot rejoin unless you unban them first.
Unban — Available for banned users. Lifts the ban so the user can rejoin with a new invite link.
Revoke Invite — Available for pending invites. Revokes the issued invite link so it can no longer be used. Useful when an invite link was sent in error or the order was cancelled.
Resend — Pro. Available while an invite is still pending. Re-emails the customer the existing invite link — useful if they lost the email. The link itself does not change.
Resend new — Pro. Revokes the current invite link, generates a fresh one, and emails it to the customer. Use this when the original link was exposed or you want to be sure the old link no longer works.
All destructive actions require confirmation before executing. After an action completes, the modal refreshes automatically to show the updated status.
Managing Members Who Joined Outside an Order #
Pro. Sometimes a member ends up in your channel without a matching WooCommerce order — most often because they joined through a channel’s primary invite link rather than a purchase. When external invites are allowed, the plugin still tracks these members, and Pro adds tools to manage them from the detail modal.
- Set expiry — Give an order-less member a time-limited stay. Choose a preset (7, 30, or 90 days) or a custom date. When the date arrives, the plugin removes them from the channel automatically.
- Clear — Remove a previously set expiry so the member’s access no longer lapses on a schedule.
- Associate with order — Link the member to an existing WooCommerce order (for example, one they paid for under a different account). Once associated, they follow that order’s normal subscription/expiry lifecycle, and manual expiry no longer applies.
These options appear only for members who are not already tied to an order. Set expiry and Associate with order are available only on active members.
Pending Invites and Retrying Failed Invites #
Pro. The Pending Invites panel lists invite links that have been issued but not yet used, as well as any that failed to generate. In earlier versions a generation failure was silent; Pro now surfaces it so you can act.
A common cause of a failed invite is the bot missing the Invite Users via Link permission on the channel, or Telegram being briefly unreachable. Each failed row shows the reason reported by Telegram.
- Retry — Re-attempts invite-link generation for a failed record. Fix the underlying cause first (for example, grant the bot the invite permission), then click Retry. On success the record moves to Pending and the link is emailed to the customer.
Because Pro preserves the customer’s activation code and order data on failure, retrying does not require the customer to re-purchase or re-activate.
Syncing Live Telegram Status #
Click Sync Status under any subscriber’s username in the table to check their actual membership status against Telegram’s API.
This makes a fresh API call for each of the subscriber’s channels and updates the database if the live status differs from what is stored. Sync also updates the subscriber’s Telegram username and name if they have changed.
When to use Sync Status: If you suspect a user left or was removed directly in Telegram (not through the plugin), syncing verifies their actual membership and corrects the database record. API responses are cached for 5 minutes to avoid rate limiting.
Automatic Data Migration #
If you are upgrading from a version before 2.0.0, the plugin automatically imports your existing subscriber data on first load.
The migration scans all WooCommerce orders with Telegram user IDs or invite links and creates records in the subscriber database. It processes orders in batches of 100 to avoid timeouts. No manual action is needed.
The migration runs once and is logged in the Plugin Activity Logs.
How Subscriber Records Are Created #
The plugin creates and updates subscriber records automatically at several lifecycle points:
- When invite links are generated for an order (status: Pending)
- When a customer activates via the Telegram bot (links the Telegram user to the order)
- When a customer joins a channel via an invite link (status: Member)
- When a customer leaves a channel voluntarily (status: Left)
- When a subscription expires or access period ends (status: Expired)
- When an admin removes, bans, or revokes an invite from the subscriber table
All transitions are automatic. For details on the customer-facing checkout experience, see What Your Customers Can Expect At Checkout.


